For each new month, you need to add a new ‘Session Module’ (Webinar Month).
It’s a bit of a process, because you need to:
- Add the new Session Module (Webinar Month)
- Add the new item link to the ‘Main Menu’
- Add the new item link to the ‘Programmes’ Menu
First, you need to go to the back-end of the website >> http://wayofmasteryonline.com/wp-admin/ (will open in a new tab).
You can also access the back-end by clicking in the top-level ‘Admin Only’ menu link in the Main Menu.
And then, step-by-step:
1. Add the new Session Module (Webinar Month)
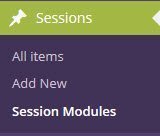
Step 1: In WordPress admin, go to Sessions >> Session Modules:
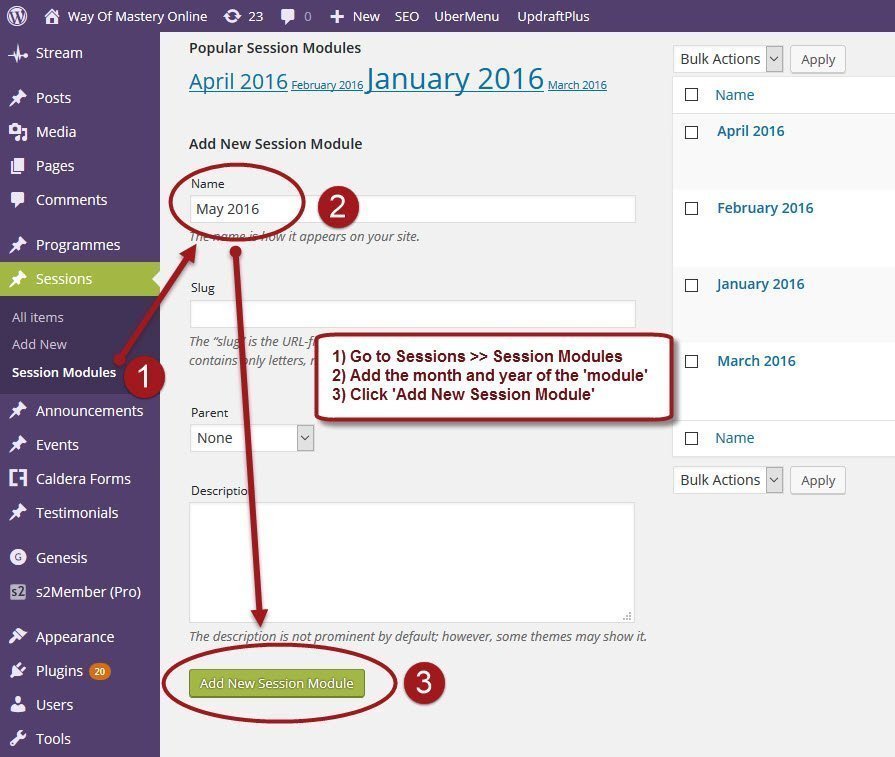
Step 2: Add a new Session Module in the format “Month Year”, as below, and click on ‘Add New Session Module’:
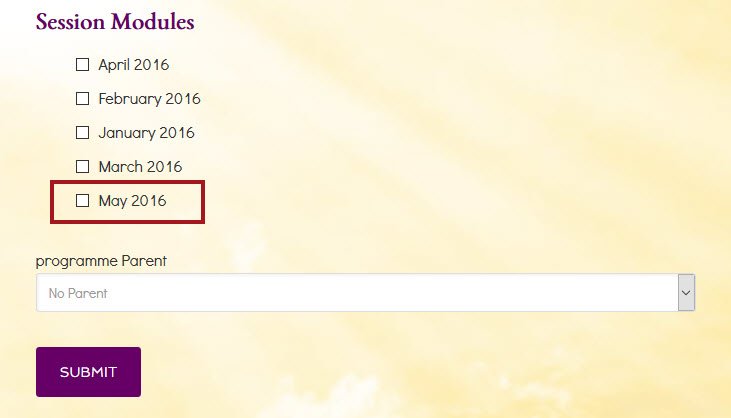
Step 2a: The new Session Module is now available (also on the front-end form):
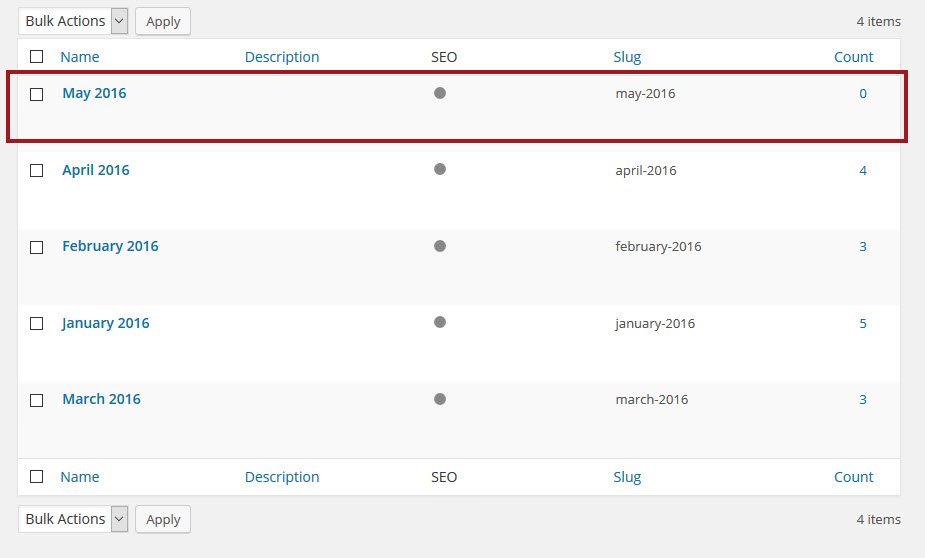
Step 2b: The new Session Module is now available (also on the front-end form):
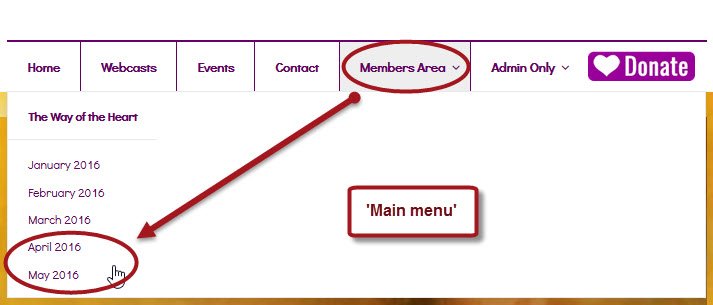
2. Add the new Session Module item to the ‘Main Menu’
Step 1: Go to Appearance >> Menus:

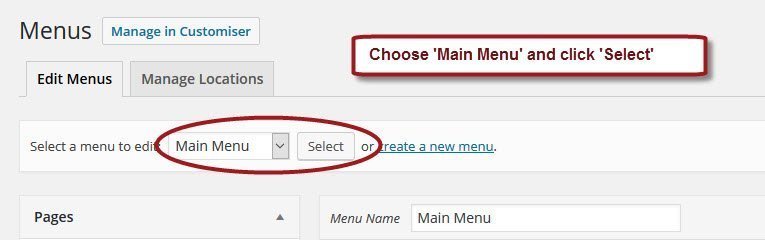
Step 2: Choose ‘Main Menu’ from the drop-down box and click ‘Select’:
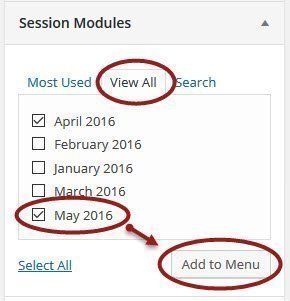
Step 3: Find the ‘Session Modules’ item box, select the modules to add, and click ‘Add to Menu’:
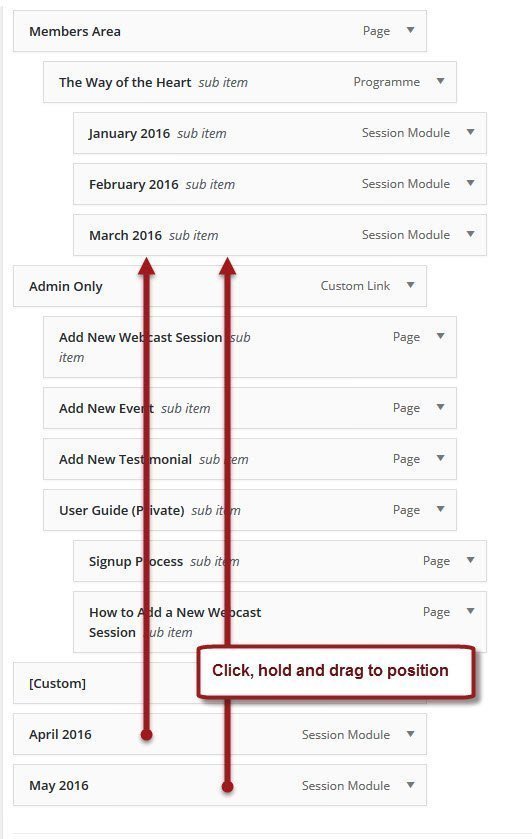
Step 4: The new menu items will be added to the bottom of the menu.
Click, hold and drag the new menu items to position at Members Area >> The Way of the Heart:
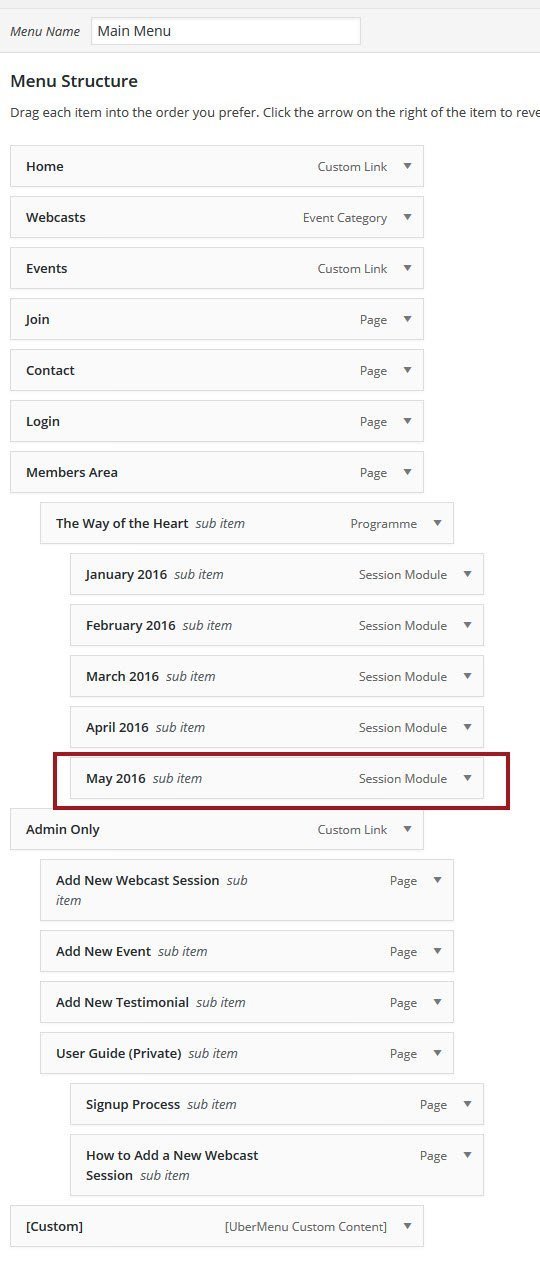
Step 4a: The new menu items correctly placed:
Step 4b: Save the menu:

Step 4c: Menu item is now added to Main Menu on front-end:
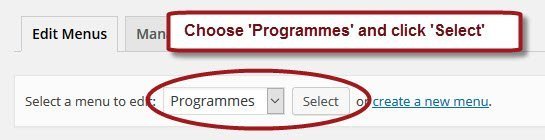
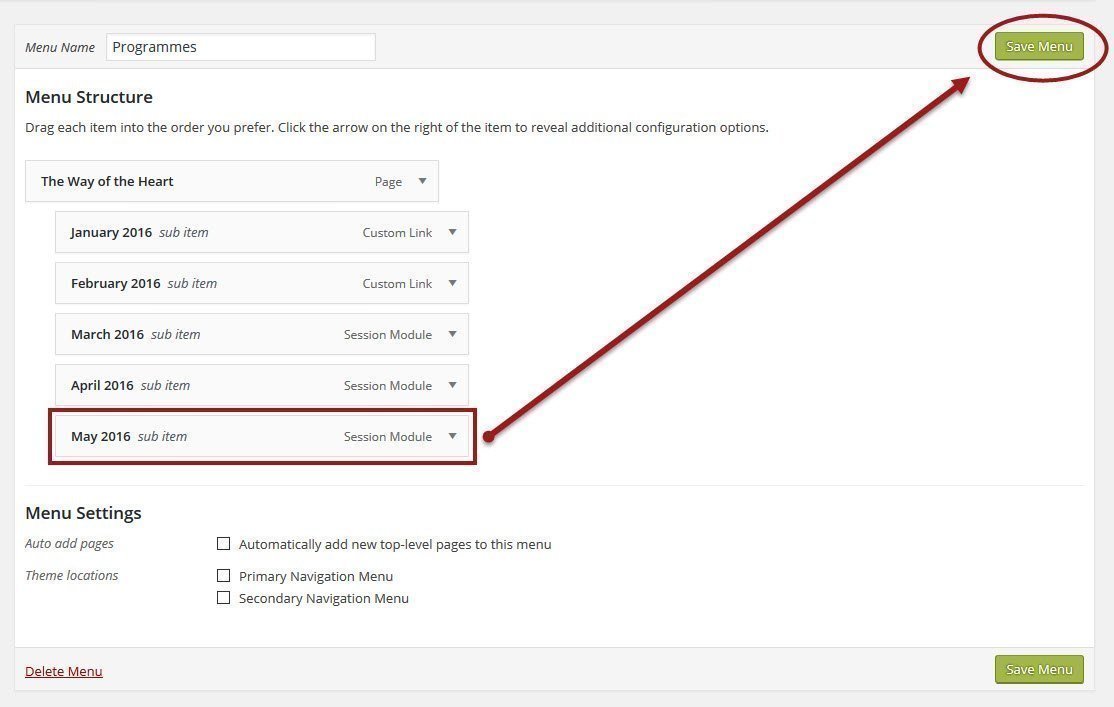
3. Add the new Session Module item to the ‘Programmes’ Menu
Step 1: Follow the same process as above, but this time select the Programmes Menu from the drop-down:
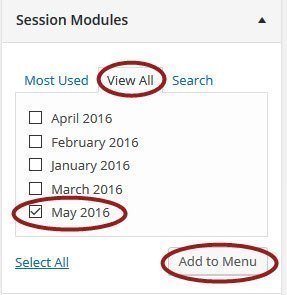
Step 2: Find the ‘Session Modules’ item box, select the modules to add, and click ‘Add to Menu’:
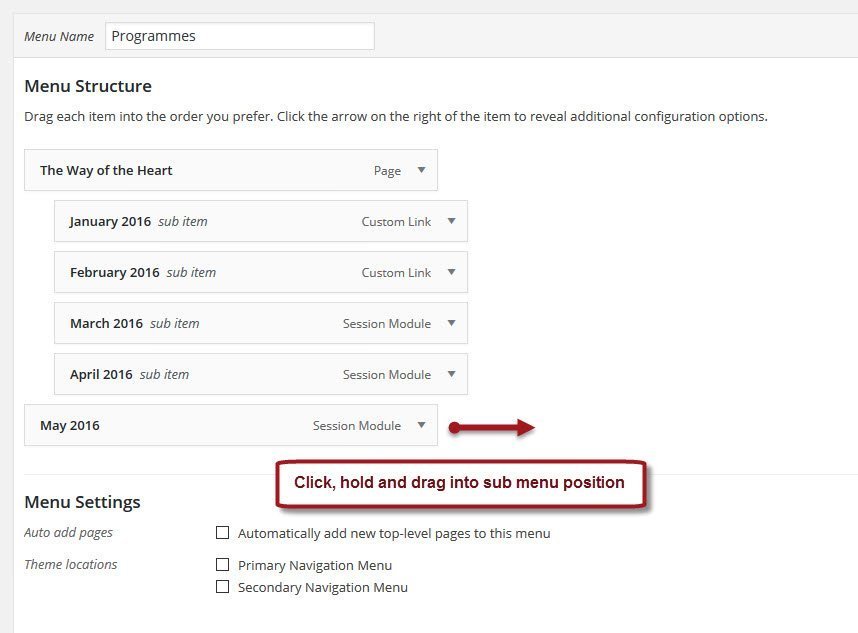
Step 3: The new menu items will be added to the bottom of the menu.
Click, hold and drag the new menu items to position:
Step 4: Save the menu:
Step 4a: The ‘Programmes’ menu appears on the front-end on the ‘Members Area’ page, and in the Right Sidebar:
