You may want to add images / an image in one of two places:
- Embedded in the post content
- As a ‘Featured Image‘ – the featured image will display on the Blog Archive page, and will be used as social share image when shared socially.
Add an Image to the Post Content
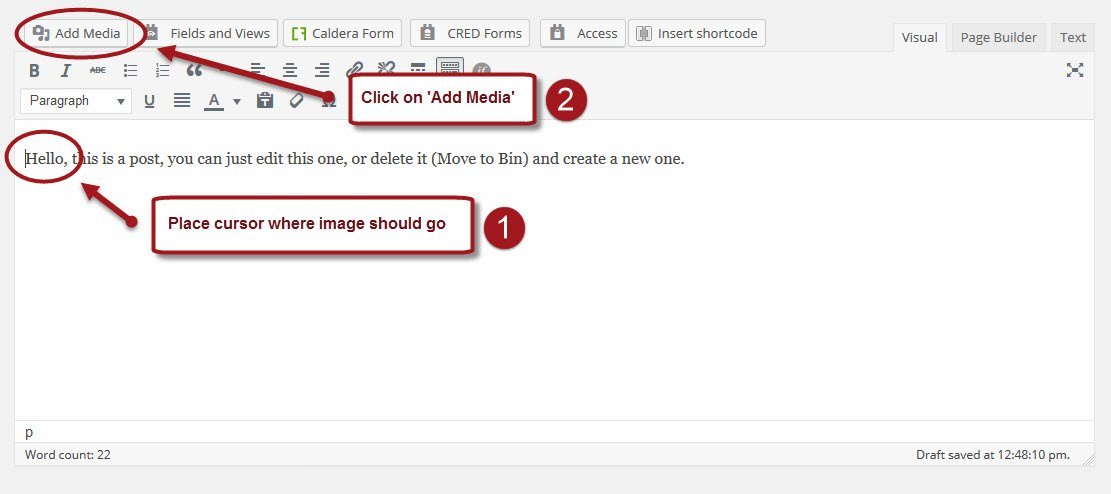
Step 1: Place the cursor at the place where you want the image inserted, and click on ‘Add Media‘:
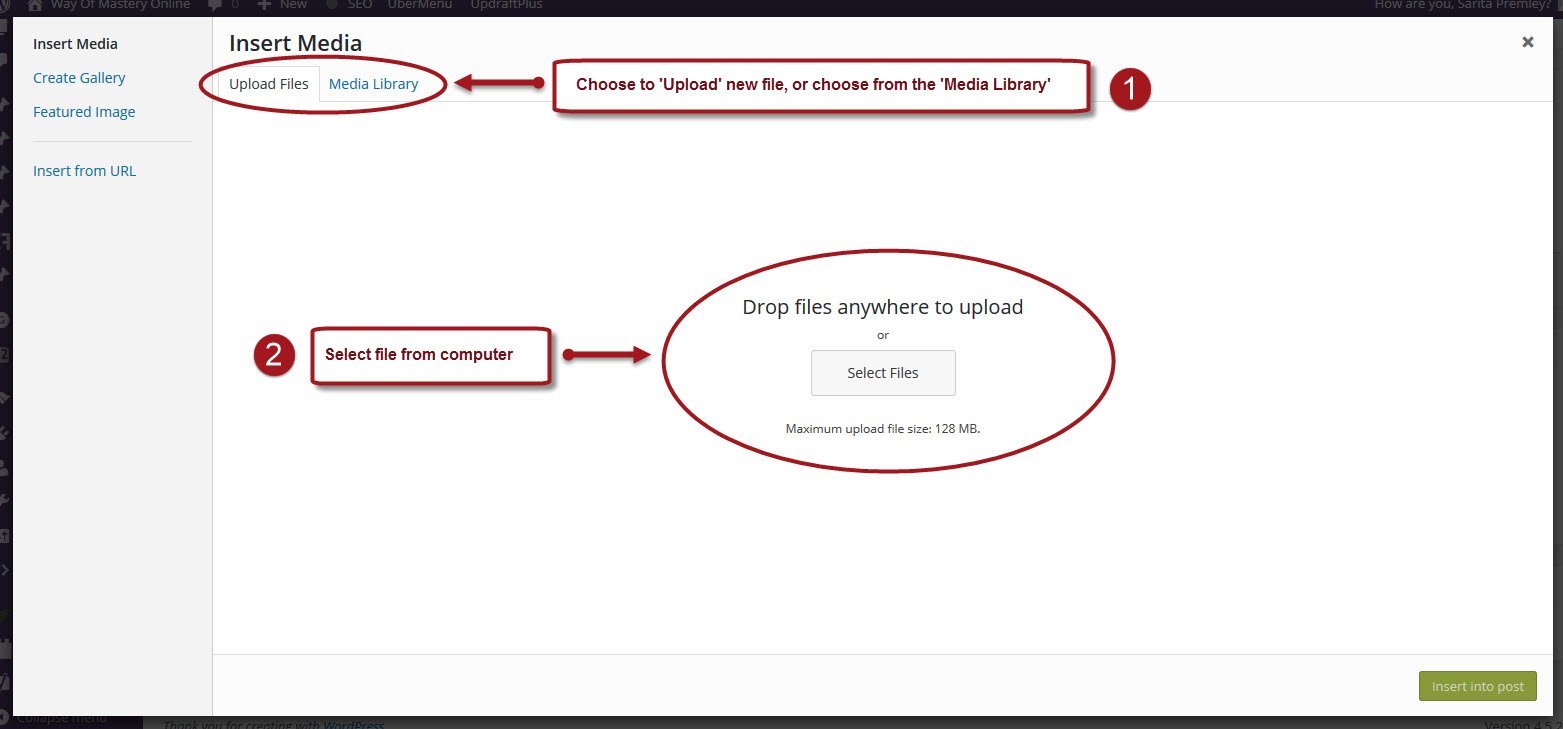
Step 2: Choose if you want to upload a new file, or use an existing image from the library:
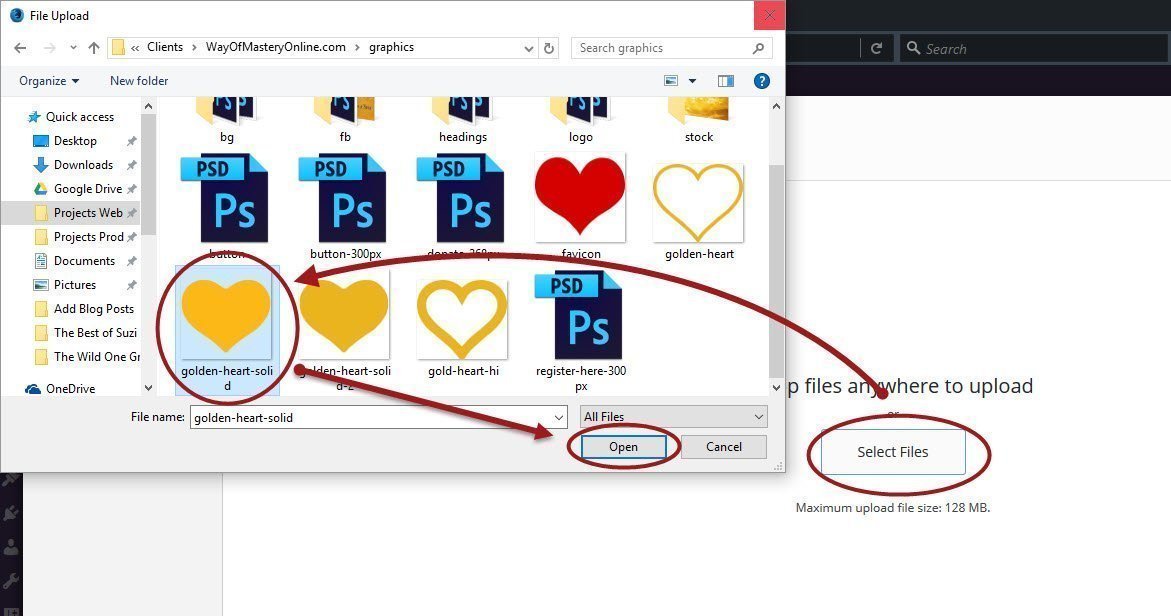
Step 3: Uploading a new file from your computer, select the file and click ‘Open’:
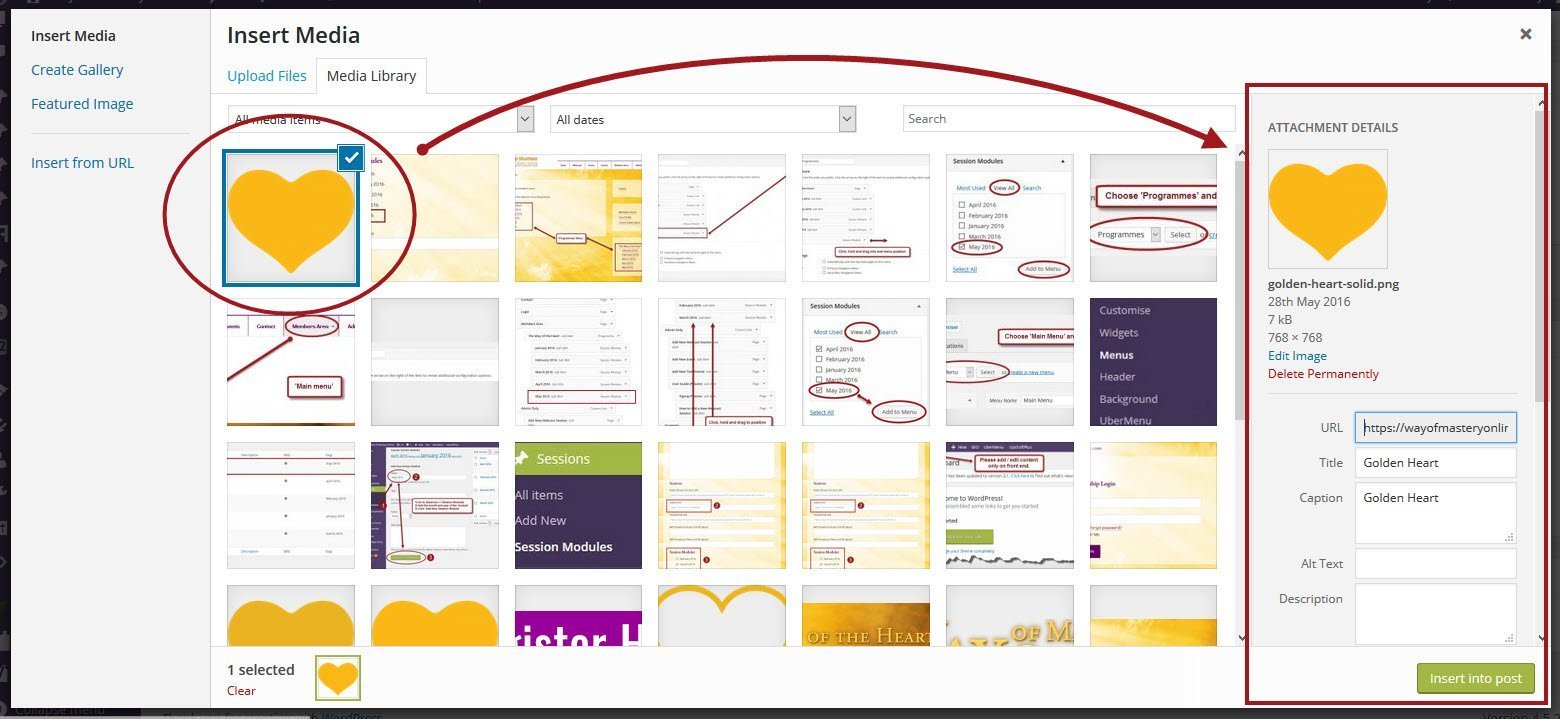
Step 4: Once uploaded, the file will appear in the Media Library.
Be sure to select the image, and the file details will show on the right:
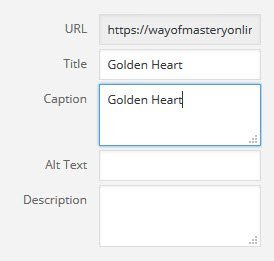
Step 5: If necessary, edit at least the Title:
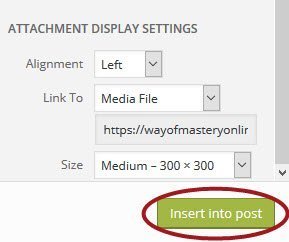
Step 6: Set the image display settings, and click ‘Insert Into Post’:
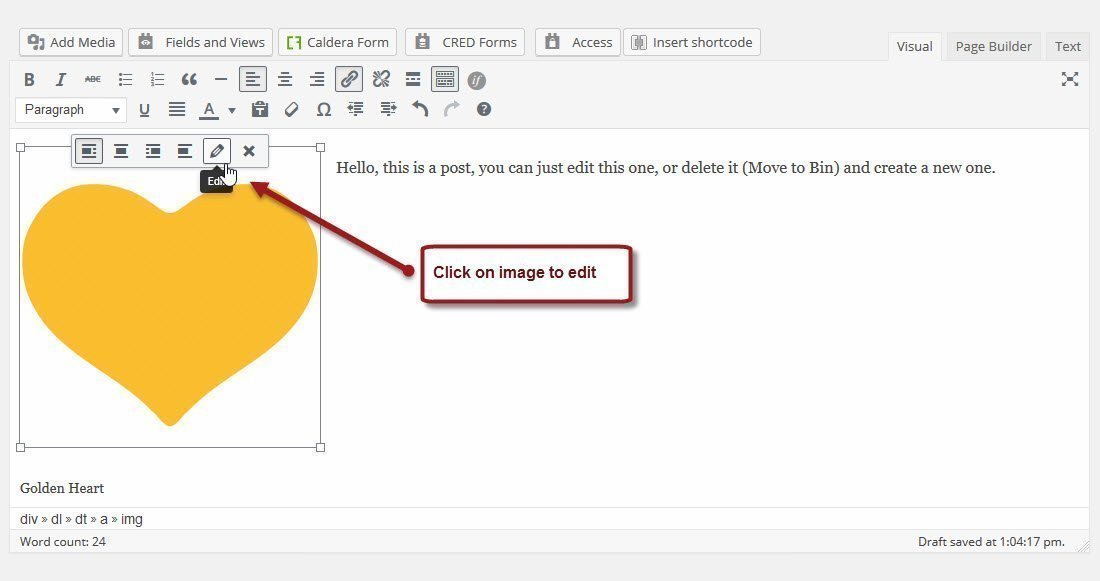
Step 7: Remember to update the changes to the post, by saving it. Once the image has been inserted, you can click on it to edit it:
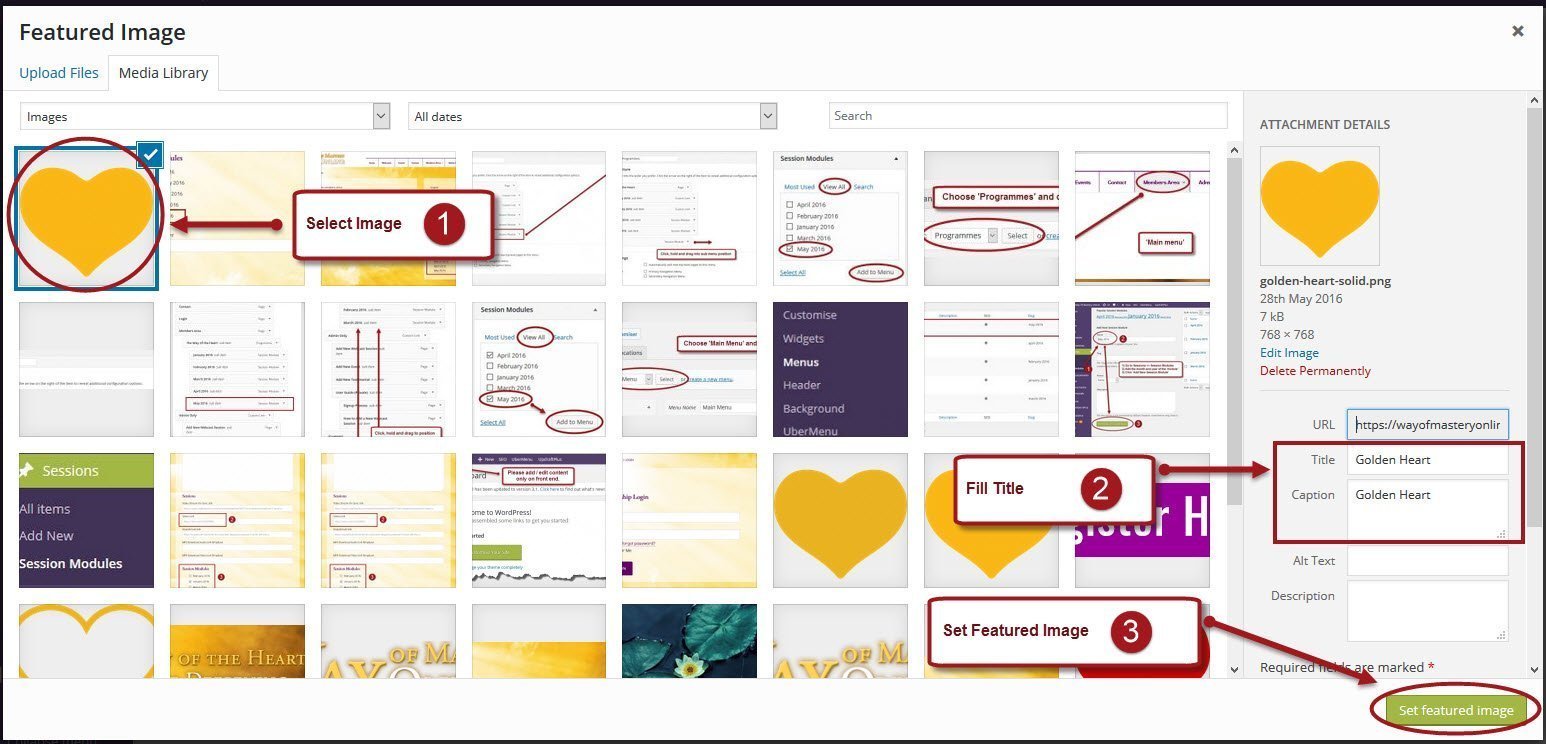
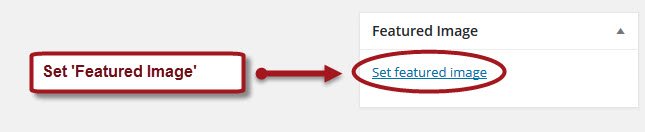
How to Add a Featured Image
Step 1: While editing the post, click on ‘Set Featured Image‘:
Step 2: Upload a new image, or choose one from the Media Library, and click on ‘Set Featured Image‘: